

There is a particular satisfaction in a cleanly cut edge, and a particular frustration in a ragged one. Composite sheet rewards patience and the right tool, and it punishes haste with frayed fibres, chipped resin and edges that never quite look finished. The good news is that a tidy result is well within reach for a careful home workshop, provided you understand what the material wants and what it does not. The difference between a professional edge and a disappointing one is rarely the tool itself; it is the preparation and the pace.
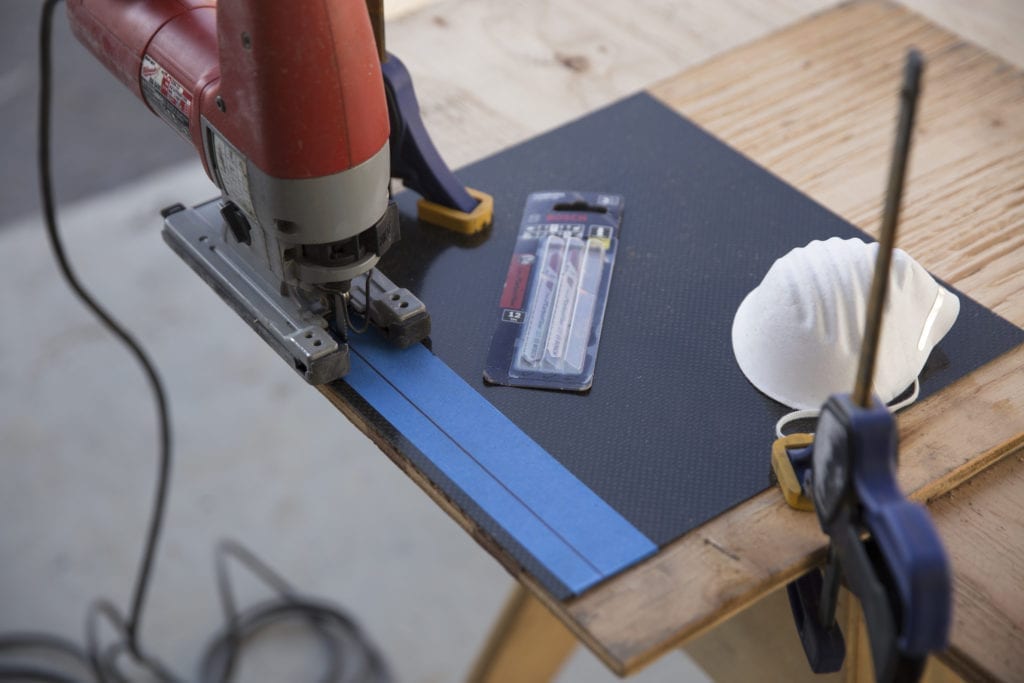
Preparation starts with marking out. Measure twice, mark with a fine pen or a sharp scribe, and lay masking tape along the cut line on both faces to support the fibres and reduce chipping. Clamp the sheet firmly to a stable bench with the cut line just beyond the edge, so the panel cannot vibrate or flex while you work. A moving sheet is the fastest route to a rough edge, and a few minutes spent on clamping will repay themselves many times over.
Tool choice matters, and the right answer depends on the thickness of the sheet and the shape of the cut. A fine-toothed blade on a jigsaw or a diamond-coated disc on a rotary tool will handle most jobs, while straight cuts on thin sheet can be made with a sharp scoring knife and a straight edge. Whatever you choose, let the tool do the work at a steady speed rather than forcing it, because pushing hard generates heat and heat damages resin. Keep the blade sharp; a dull edge tears fibres instead of slicing them.
Dust is the part of the job that newcomers underestimate, and it deserves respect. Composite dust is fine, irritating and unwelcome in lungs and eyes, so work in a ventilated space with a proper respirator, eye protection and gloves. A vacuum nozzle held near the cut keeps the worst of the dust down and keeps the cut line visible, which helps accuracy too. Clean up thoroughly afterwards, because the dust settles on everything and is not kind to other projects or to the car itself.
If you are about to make your first cuts, a methodical guide is worth its weight in time saved. This walkthrough on cutting carbon fiber sheet covers blade selection, marking, clamping and finishing in the order you will actually use them, and it is a sensible read before you switch anything on. The single most useful habit it teaches is to make a test cut on a scrap piece first, so you can check your speed and blade choice before touching the real panel.
Marking out a curved or shaped cut calls for a template rather than a freehand line. A stiff card or thin plywood template, traced from the part or the opening it must fit, lets you check the shape before you commit to cutting, and it can be reused if you need a second piece. Tape the template to the sheet, trace around it carefully and step back to check the line from a distance before you pick up the saw. A line that looks right up close can reveal a wobble from two steps away, and catching it now costs nothing.
Finishing the Edge
A cut edge is only half finished until it is dressed and sealed. Start with fine abrasive paper, working through the grades until the edge feels smooth to the touch, and keep the paper flat so you do not round the edge unevenly. A thin coat of clear resin or edge sealant protects the exposed fibres from moisture and gives the edge a tidy, professional look. Take your time here, because the edge is the part of the job that everyone sees and touches, and a neat finish makes the whole project look deliberate.
Curves and holes deserve extra care, because they concentrate stress and show every wobble. Cut curves in a series of gentle passes rather than one aggressive sweep, and drill holes with a sharp bit at moderate speed, backing the panel with scrap material to prevent breakout on the far side. If a hole must be enlarged, step up through drill sizes rather than jumping straight to the final diameter. These small disciplines are what separate a part that looks bought from a part that looks made.
Knowing Your Limits
Some jobs are worth doing yourself and some are worth paying for, and knowing the difference is part of the craft. A simple panel trimmed to size is a fine home project, while a complex shaped part or a piece that carries structural loads may belong in a specialist workshop. If you are unsure, ask a professional for a quote before you start, because the cost of expert help is usually far less than the cost of replacing a spoiled sheet. A good result you enjoy is worth more than a brave attempt you regret.
Frequently Asked Questions
What blade should I use for composite sheet?
A fine-toothed blade or a diamond-coated disc suits most jobs, and the choice depends on thickness and cut shape. Keep the blade sharp and let it cut at its own pace rather than forcing it through.
How do I stop the edge from fraying?
Tape both faces along the cut line, clamp the sheet firmly and cut at a steady speed. Dressing the edge with fine abrasive paper and sealing it afterwards gives a clean, lasting finish.
Is the dust dangerous?
It is irritating to lungs, eyes and skin, so wear a respirator, eye protection and gloves, work with ventilation and clean up thoroughly. Treat dust control as part of the job, not an afterthought.
Conclusion
Cutting composite sheet well is a matter of preparation, patience and respect for the material. Mark carefully, clamp firmly, cut steadily and finish the edge properly, and the result will look like it came from a professional shop.